Android is very useful and widely used in Programming. First you have to know how to install Android SDK and Android development tools(ADT) plugin in Eclipse IDE for developing android project easily.
For that you have to download these softwares as listed followings:
- JDK
- Eclipse IDE
- Android SDK
- Android SDK tools
You can also download these softwares from the following links:
- JDK
- Eclipse IDE
- Android SDK
When downloaded is completed. Then you have to first install java development kit (JDK 1.7) on your system. When you clicked on jdk1.7 then installation is started. Then you have to install eclipse ide in your system. First copy the zip file and extract that zip file in your system, after extraction same name folder is created. Then open Eclipse IDE then eclipse window is open. Android offers a plugin for the Eclipse IDE called Android Development Tools(ADT).
Installation steps for Android SDK :
1. Download the Android SDK from the given link.
2. Now extract the Android SDK zip file. After extraction new folder of Android sdk is created.
3. Click on SDK Manager.exe then new window is open
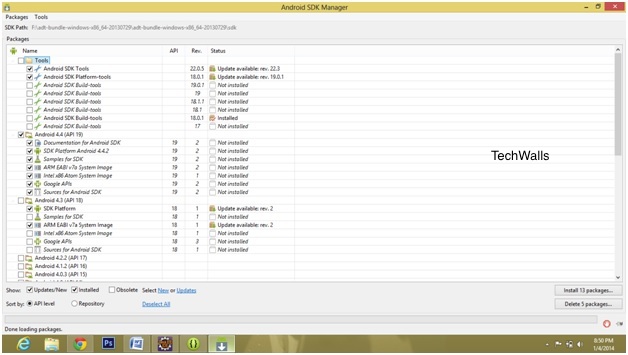
4. Then install all Android sdk tools for all versions for Android.
After installation of all software then you have to follow steps to plugin the eclipse ide with android sdk. The plugin provides a powerful environment in which to develop Android app.
Step 1
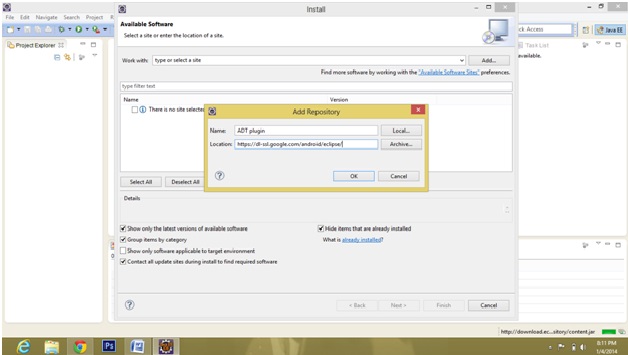
The following steps are to install android plugin for Eclipse IDE:
1. Open eclipse go to help -> install new software.
2. Click Add in the top right corner.
3. In the dialog box enter ADT Plugin for the Name and following URL for Location that is “http://dl-ssl.google.com/android/eclipse ” and click ok.
4. In available software dialog select the checkbox and click Next.
5. The you will see new window of tools to be downloaded click Next.
6. Accept the license agreements, then click finish.
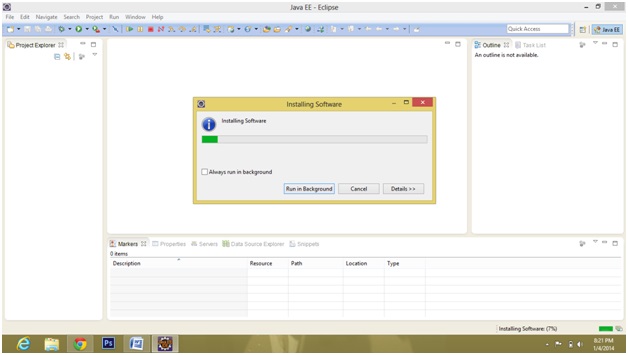
7.When installation completed then restart the Eclipse IDE.
Step 2
After installing the ADT Plugin you have to define the location of Android SDK in Android Preferences in Eclipse. There are some following steps for setup the location of Android SDK :
- Open Eclipse IDE goto the Window ->Preferences to open the android preferences.
- Select the android from the left panel.
- After selecting the android for setup the android sdk location , click browse and locate your Android SDK Location. For example (D:\Android\android-sdk).
- Click Apply button then click ok.
- After this restart you Eclipse IDE.
Now you are successfully plugin with Eclipse IDE and Android SDK tools.
Hopefully this information is helpful to you
Thank you
Disclosure: We might earn commission from qualifying purchases. The commission help keep the rest of my content free, so thank you!