VMware has been the best desktop virtualization software for home and business markets for more than a decade and it continues to consolidate its position with the latest version, the VMware Workstation 10.
VMware Workstation 10 New Features
Despite the competitions from Oracle or Parallels, VMware is still the best solution with the new powerful features. The most prominent feature of Workstation 10 is that it supports input from tablet sensors like the accelerometer, gyroscope, compass or ambient light sensor. This support is limited to the Surface Pro and some other fully-compliant tablets. That means you can run a Windows 8 VM on a Surface Pro and the VM still can get all the tablet functionalities.
Some other notable features include advanced restrictions to set expired time for VMs, new interface for using multiple VMs, easy multiple monitor setup. Besides, a VM now supports 16 virtual CPUs and 16 cores per virtual CPU, 64GB of RAM, 8 TB SATA disks, 20 virtual networks and SSD Pass through.
Make sure that your computer meet the following hardware requirements:
- 64-bit x86 Intel Core Solo Processor, AMD Athlon 64 FX Dual Core Processor or equivalent
- 1.3GHz speed
- 4GB RAM recommended
Also notice that if you are installing an older version of VMware Workstation, you will need to uninstall it before installing the Workstation 10. Now, follow the steps to install VMware Workstation 10 on Windows.
Step 1: Start Setting Up
- Download VMware Workstation 10 and log in to your computer as administrator.
- Go to the installation file you have just downloaded, right click and choose “Run as administrator“. Click Next to start the setup.
Step 2: Installing
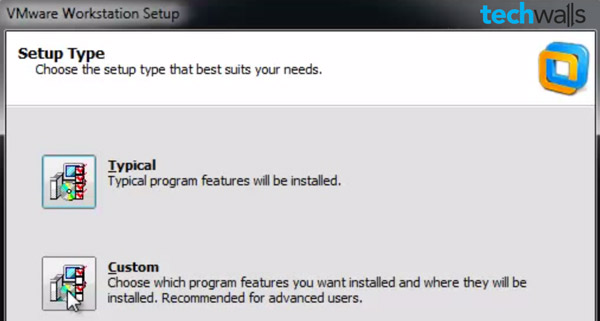
- Accept license agreements and click Next. Then you will see there are two setup types, typical and custom. We will choose the option Typical.
- Follow the on-screen instructions to continue, you will just keep selecting Next and Continue.
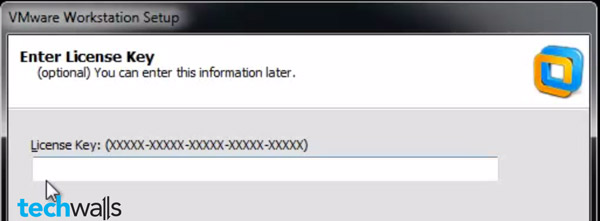
- Then, you will be asked to enter license key. You can enter the key right now or choose Skip to enter later.
- Click Finish.
Step 3: Running
Restart your computer after the setup is finished.
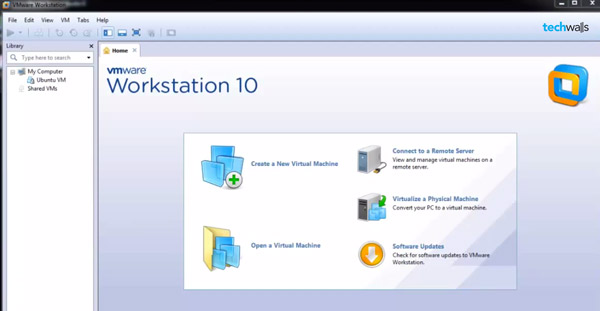
You will see the VMware Workstation on desktop now. Double click to run the software.
Disclosure: We might earn commission from qualifying purchases. The commission help keep the rest of my content free, so thank you!


Qoyyuum says
Or if you’re using Windows 8 already, there’s a built-in VM application that is ready for use. It’s called Hyper-V. Works just like VMware or VirtualBox with some differences.